Vista copies and stores user-created files of an application, such as DB/TextWorks (DBT), in a location called the VirtualStore.
When a program is installed, one should make sure the application files will be installed in C:\Program Files\"Company name"\"name of the program."
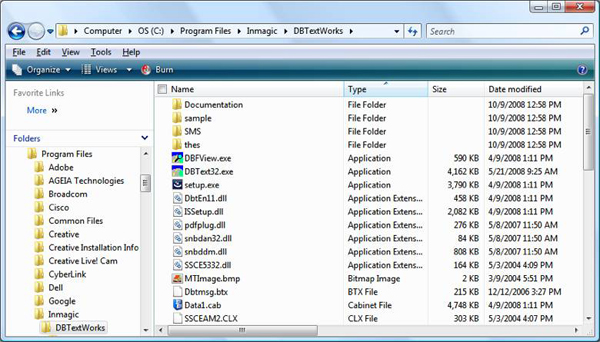
For DB/TextWorks, the program location would be —
C:\Program Files\Inmagic\DBTextWorks.
Please make sure this is the chosen installation path for DB/TextWorks application.
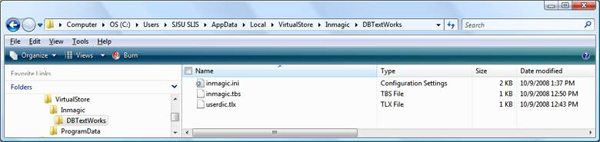
However, when files are created using the application, it is automatically stored to a different location under the VirtualStore folder.
For example, the user file location for DBT is —
C:\Users\"user name"\AppData\Local\VirtualStore\Program Files\Inmagic\DBTextWorks.
The "user name" is an account name. Each user would have his/her own unique user name assigned in Windows. In examples cited throughout this tutorial, the user name had been set as SJSU SLIS
This default user file storage location is called User File Path and User File Directory by DB/TextWorks.
Depending on the particular version of DB/TextWorks application you are running, the default User File Directory could be different.
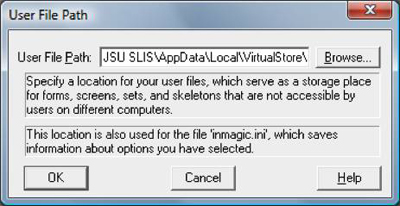
DB/TextWorks initial setup. Example of an incomplete User File Path.
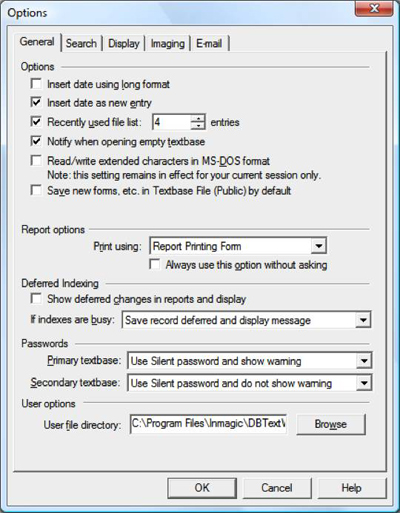
DB/TextWorks → Tools → Options… → User file directory. An example of a non-desirable User File Directory/Path.
You should always set your User File Directory/path to this recommended location —
C:\Users\"user name"\AppData\Local\VirtualStore\Program Files\Inmagic\DBTextWorks
The path to get to those files is, therefore, a bit long. Creating a shortcut to the DBTextWorks folder and putting the shortcut onto the Desktop will make it easy to locate user files. To do so, please follow these steps.
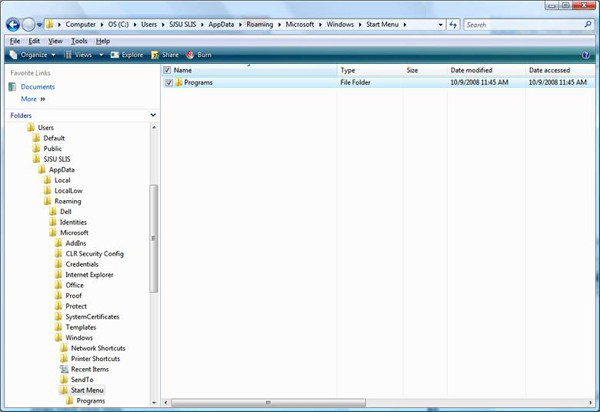
Right-click the Start button (  ) on the lower left corner of the Desktop and select Explore. Windows Explorer opens up initially in the
Start Menu of a user account.
) on the lower left corner of the Desktop and select Explore. Windows Explorer opens up initially in the
Start Menu of a user account.
Click on the inside of the address bar near the top. It will highlight the address.
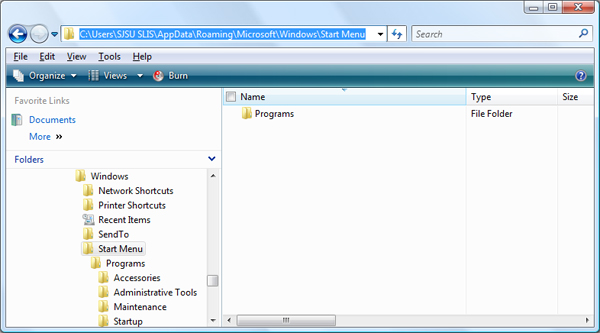
Enter this path into the address bar —
C:\Users\user name\AppData\Local\VirtualStore\Program Files\Inmagic.
Again, the user name is an account name. You would enter your own unique user account name in place of the user name. In this example, the user name is SJSU SLIS. So the address is thus C:\Users\SJSU SLIS\AppData\Local\VirtualStore\Program Files\Inmagic. Click the Enter key after you had typed the correct address to the user file location of the VirtualStore. The Inmagic folder opens.
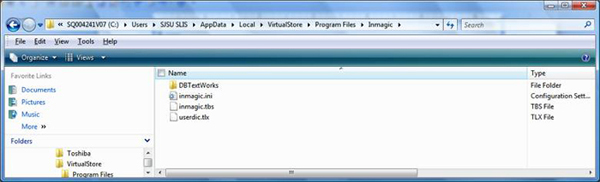
Right-click on the DBTestWorks folder icon → select Send To → Desktop (create shortcut).
You have just created a shortcut of DBTextWorks on the Desktop.
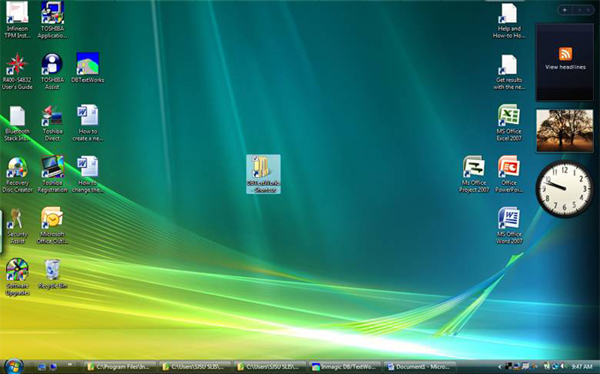
Double–clicking this shortcut will open up the DBTextWorks folder within the VirtualStore. This folder will store all the application files that are created.
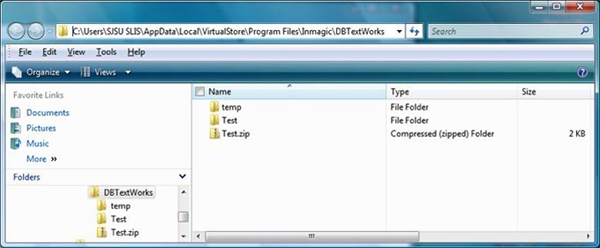
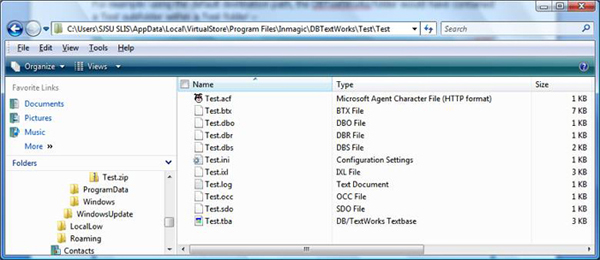
As an example, a DB/TextWorks database, called Test, had been created. It is represented by 11 files in this DBTextWorks folder. They all have the same name but different extensions. Therefore, if the "DBTextWorks — shortcut" on the Desktop screen was double-clicked, this is what will display
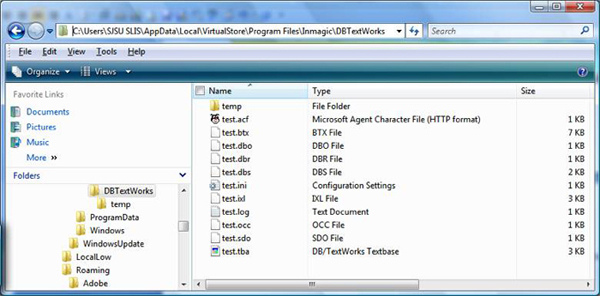
Please remember when you create a database in DB/textWorks, DBT will automatically create, not one, but 11 different files to represent the database. Again the 11 files will have the same name but different extensions. The extensions are .acf, .btx, .dbo, .dbr, .dbs, .ini, .ixl, .log, .occ, .sdo, and .tba.
If you want to send your database to others, you would have to copy and send all 11 files, preferably in a folder. We will get to that later.
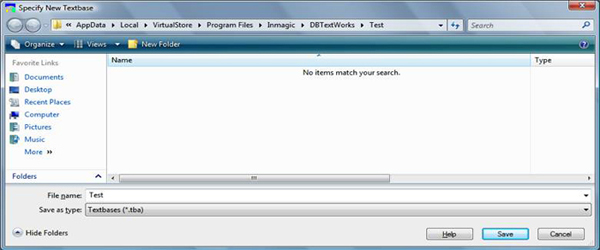
As you build your DB/TextWorks database, you will soon have many files making it difficult to find them. It is recommended that you create, by clicking File menu → New → Folder → name the folder, a separate folder for each new database.
For example, the DBTextWorks folder's structure in the VirtualStore and the Test database had been redone. A new folder called Test had been created within the DBTextWorks folder prior to the creation of the Test database, and this Test folder was specified as the folder to store the new database. In short, a new folder had just been added to store the Test files.
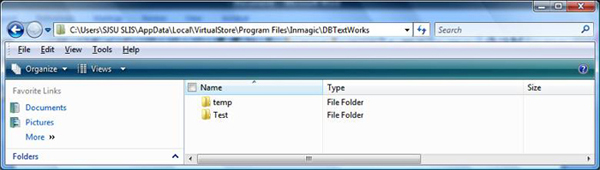
The new folder, Test, was added and used to specify as the storage place when creating the new Test database.
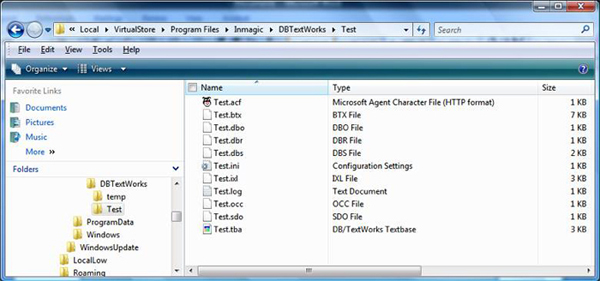
After the new database, Test, is created, the 11 files will be found in the Test folder.
To send the database out to others, one should first compress the database folder, which contained the 11 database files, and then send out the zipped file.
One quick note — the zipped folder has essentially become one file.
Using Test folder as an example, here are the steps to compress a folder (zip) and turn it into a compressed file. This is the same process for both Windows XP and Vista.
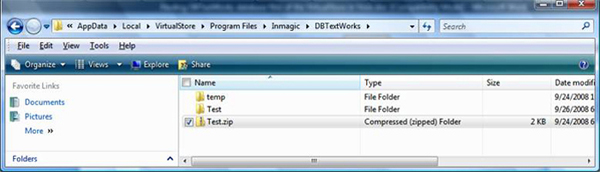
In the DBTextWorks folder, right-click the Test folder → click Send To → click Compressed (zipped) Folder. The compressed folder is now created and is represented by the Test.zip file.
If you use a Web-based e-mail service like Gmail or Hotmail, you can e-mail the Test.zip file as an attachment.
If you have setup an e-mail client application, such as Microsoft Outlook or Outlook Express, you can e-mail this Test.zip file to others while you are still at the DBTextwoks folder.
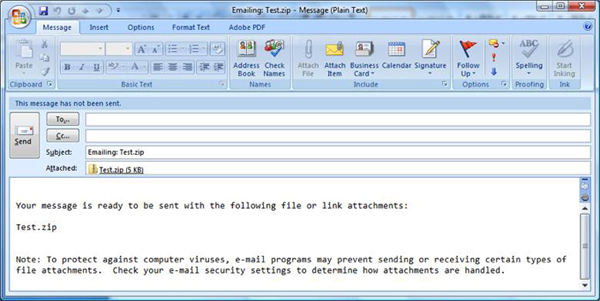
To do so, please follow these steps — Right-click on the file, Test.zip (as an example) → select Send To → select Mail Recipient.
The e-mail application will launch with the file already attached. You then type in the recipient’s e-mail address and press the Send button to finish the send process.
On the other hand, as a recipient of a DB/TextWorks database file, it is best to save the received attachment in the following folder:
XP — C:\Programs Files\Inmagic\DBTextWorks
Vista — C:\Users\user name\AppData\Local\VirtualStore\Program Files\Inmagic\DBTextWorks
(Again the "user name" here is an account name. You would enter your own unique user account name in place of the "user name," In this example, the user name is SJSU SLIS. So the address is thus
C:\Users\SJSU SLIS\AppData\Local\VirtualStore\Program Files\Inmagic\DBTextWorks.)
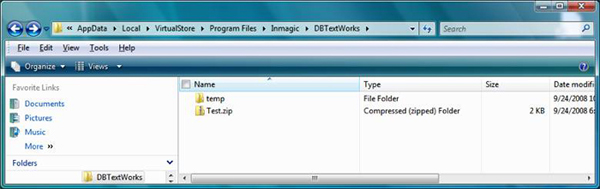
Using the Test.zip as an example of a saved attachment, this is what you would see.
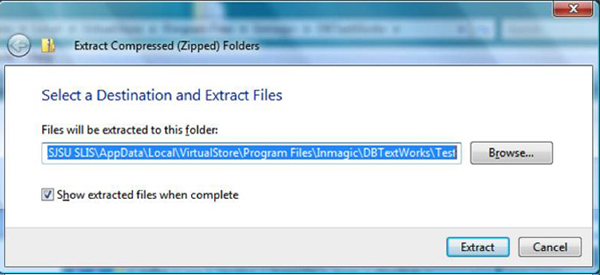
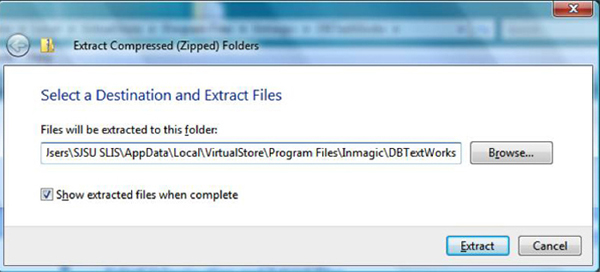
To decompress the Test.zip file, right-click the file and select Extract All…
This dialogue box which opened would allow you to select the destination folder.
The default path to the folder, which appeared with the dialogue box, is most likely the one that leads right into the same folder as the zipped file. This is basically a good start.
The minor issue is that, using this default path as the extracting destination, the resulting folder will have a subfolder of the same name, creating one extra layer of folder. This is not a good practice in the long run.
For example: Using the default destination path for decompression, the resulting DBTextWorks folder would have contained a Test subfolder within a Test folder —

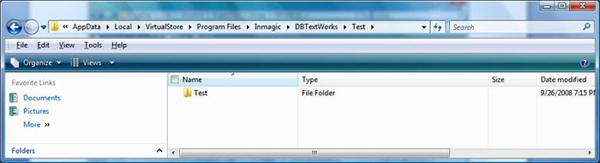
Notice how the DBTextWorks folder contains \Test\Test. An extra layer.
Therefore, when setting the destination path during the extraction step, do remove the last folder from the entry of the path if it is selected by default. This is done for the purpose of not having the same folder duplicates itself as a subfolder.
In this example, the last portion of the path, \Test, is deleted. It would look like this.
Therefore, as a rule, always use C:\Users\”user name”\AppData\Local\VirtualStore\Program Files\Inmagic\DBTextWorks as a default file location.
After the extraction process, the Test folder appears as expected. And you may delete the Test.zip file or just keep it handy.
This Test folder will not have the extra Test subfolder.

This concludes the tutorial.


One Washington Square - San José, California USA, 95192-0029
Phone: 408-924-2490
Contact SLIS

 Back
Back